Blizzard of Zeros:
Calling a BBS using the Ulimate-II+ for the Commodore 64/128
Created and Maintained by The Dust Council
Last Update (UTC): 2020-Aug-14
Current Date (UTC): 2026-Feb-06
Back to Main
Tools required:
- Ultimate-II+ - This is a cartridge which, among other things, can emulate a modem over Ethernet (ATDT to telnet). It also has a USB port into which a FAT16/32 USB stick containing .d64/.d81 disk images can be "mounted" as if it were a floppy in a disk drive by pressing a button on the cartridge. It eliminates the need for having a Commodore disk drive at all. [Official Site]
- Ultimate-II+ Firmware v3.7 (2020-03-09) or later - As of August 2020, the Ultimate-II+ is shipped with old firmware which doesn't support modem emulation. This may change in the future. [Official Site]
- CCGMS Ultimate - Terminal Software that can support the Swiftlink emulation provided by the Ultimate-II+ [Official Download Site] [Local Mirror]
Prepare USB stick:
- Format a USB stick using FAT16 or FAT32 (exFAT does not work).
- Unzip the firmware and save the unzipped update_x.x.u2p file on the USB stick.
- Save the ccgms ultimate.d64 image on the same USB stick.
Install the Ultimate-II+ hardware (be sure your machine is powered off):
- Connect the included 1541 cable to the Ultimate-II+.
- Plug the USB stick into any available port in the Ultimate-II+
- Plug the Ultimate-II+ cartridge into your cartridge slot.
- Plug the other end of the 1541 cable into the disk drive serial port of your C64 or C128.
- Plug an Ethernet cable into the network jack and connect the other end to your router or switch.
Configure the Ultimate-II+ for modem emulation.
Turn on the computer. At the time of this writing, the default emulated cartridge in the cartridge port is the
CYBERPUNX RETRO RELAY. This cartridge conflicts with the modem emulation so we will configure the Ultimate-II+
to boot up with no emulated cartridges for now.
- Press the middle button on the Ultimate-II+ cartridge. This brings up the menu from which disks can be mounted and
the Ultimate-II+ can be configured. Pressing this button will not normally interrupt sessions on your Commodore 64/128,
so you can press it to, say, switch disks without the system resetting (for example, in a multi-disk game).
RUN STOP will return you to your session.
- UPDATE FIRMWARE: You should see two entries on your screen - one for a USB stick and one for a
network connection.

Making sure your USB stick is highlighted (you can use the
cursor up/down keys if not), press
RETURN twice. You should see the CCGMS disk image as well as the firmware file you saved to your USB stick, along
with any other disk images (.d64/.d81) you may have saved to the USB stick. Using your cursor keys, select the
update_x.x.u2p file and press RETURN. Make sure Run Update is highlighted, and this will update your firmware.
When it is finished updating, it will ask you to power down your computer entirely. Do so. When you turn the machine
back on, you will be using the new firmware and will once again be looking at the CYBERPUNX RETRO RELAY screen.
Please note you need at least v3.7 to use modem emulation, so don't skip this step.
- CONFIGURE NETWORK: Press the middle button on the cartridge. Then press F2 [SHIFT-F1] to bring up the
Ultimate-II+ configuration menu. Highlight Network Settings and configure the machine accordingly for your network.

I always use a static IP address. Be sure the Gateway is correct, and you can set whatever hostname you like. You can
select each option by using your cursor keys and pressing RETURN. When you are done, press RUN STOP. You will
be prompted to save the settings to flash. Select YES and press RETURN.
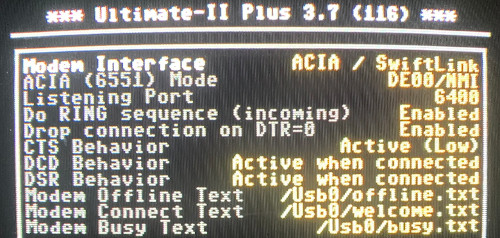
- CONFIGURE MODEM: Press F2 again to bring up the configuration menu. Select MODEM SETTINGS. If
you do not see MODEM SETTINGS, you did not update your firmware, or it did not update correctly. Set the
ACIA (6551) Mode to DE00/NMI. The rest of the settings may remain at their defaults.

Press RUN STOP and save to Flash.
- REMOVE CYBERPUNX RETRO RELAY CARTRIDGE. This will conflict with the Swiftlink/modem emulation at DE00.
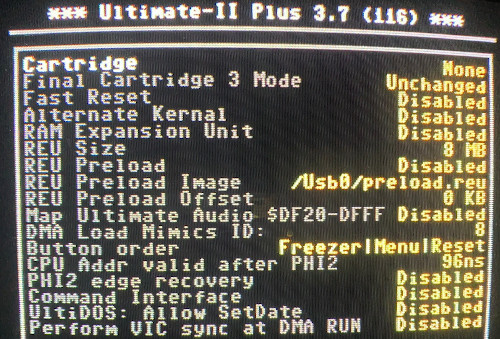
Press F2 to go back to the configuration screen and select C64 and Cartridge Settings. Select the
Cartridge option if it is not already selected and press RETURN. Note how many options you have here for
later use. For now, though, select None so the system boots up without any emulated cartridges.

Press RETURN, then RUN STOP and save your changes to Flash.
- REBOOT. Physically turn off your system to do a hard boot. This will ensure that the Ultimate-II+ is reading
all of the right settings from Flash.
Boot CCGMS, configure it, and "call" (telnet to) a BBS
This time when you boot you will be dropped to your standard Commodore READY. prompt and no cartridge should load. If
you see the CYBERPUNX RETRO RELAY CARTRIDGE again, go back into the configuration and repeat the process above.
- Press the middle button on the cartridge. Make sure that your USB stick is highlighted and press RETURN twice.
- Using your cursor keys, highlight ccgms ultimate.d64 and press RETURN once. Then select Run Disk to
boot it. (Basically a LOAD"*",8,1)
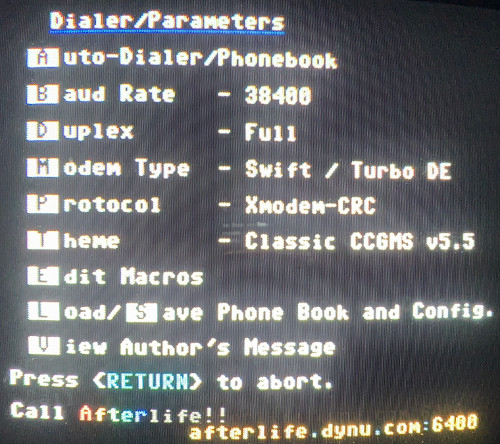
- When CCGMS loads, press F7 to bring up the configuration menu. Set Modem Type to Swift / Turbo DE. For
future reference, the other options refer to the address you configured in the modem emulation. In this case, Swift / Turbo DE
refers to DE00/NMI you configured in the Configure Modem procedure above.

- Set the Baud rate to 38400, which is pseudo-38400 (it will drop to accommodate whatever the answering BBS can support.)
- Choose Save to save the phone book and configuration so it is automatically set the next time you boot CCGMS. It is
probably wise to use the default phone book/configuration file name, ccgms-phone.
- Press RETURN to return to the terminal. First type at and press RETURN. You should get an ok in
response. Note that commands may be case-sensitive depending on your terminal emulation (PETSCII or ASCII). In PETSCII, the commands
must be in lowercase.
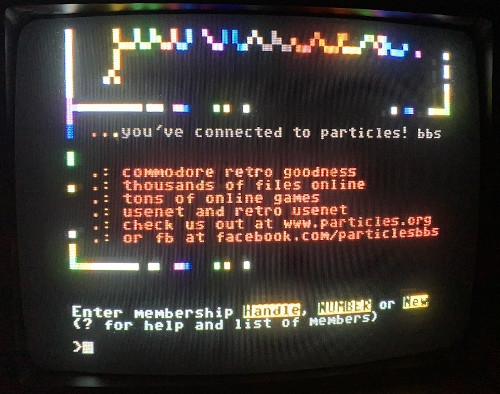
- If you get an ok response, the modem emulation is working. Find a BBS on C= BBS Outpost
to call. For example, Particles! BBS. Particles runs on port 6400. To telnet there we
use the old ATDT command, separating the port from the hostname with a colon, like so: ATDTparticlesbbs.dyndns.org:6400

- Note that any backspacing to correct typos in the ATDT command will probably mean you have to re-type it as the backspaces will be
interpreted as strings. You can use the classic +++ to bring up an AT prompt where you can issue an ATH0 to disconnect
the telnet connection.
Back to Main
Contact information:

See also: frostwarning.com


